Installation Instructions
- General
- Steps to Download & Install
- Downloaded file (without Apache Tomcat)
- Downloaded file for Linux (with Apache Tomcat in TAR.GZ format)
- Downloaded file for Windows (with Apache Tomcat in ZIP format)
- Start Tomcat
- Stop Tomcat
- Access eLink
- Configure eLink
- Version < 6.0
- Version >= 6.0
- Upgrade eLink
- Common errors and instructions to troubleshoot
Installing LeanSwift eLink
Please watch the installation video on how to quickly install eLink on your own server
General
General
- This is a one time installation per M3 environment.
- You can install it on the server with a static ip and/or DNS/host name. Server must be publicly accessible on the given port and we recommend putting it in the DMZ.
- You only need to open port 8443 (or other port, if you have changed the default Tomcat configuration for HTTPS port number) to the server. The port and public ip and/or DNS/host name must be reachable from outside your company's network. You can lock down all other external access to the server.
- Internally the server needs to have full access to M3 servers, as well as your mail server (and be allowed to relay emails) for full functionality.
- Our recommended server requirements are
- 64 bit OS
- 8 GB RAM
- 50 GB HDD
- 2 CPU cores
- JRE 7 or JRE 8
- Apache Tomcat 7 or 8
- 64 bit OS
- 16 GB RAM
- 100 GB HDD
- 2 CPU cores
- JRE 7 or JRE 8
- Apache Tomcat 7 or 8
- Note that eLink will run on both Linux and Windows OS.
Testing environment
Production environment
Steps to Download & Install
Steps to Download & Install
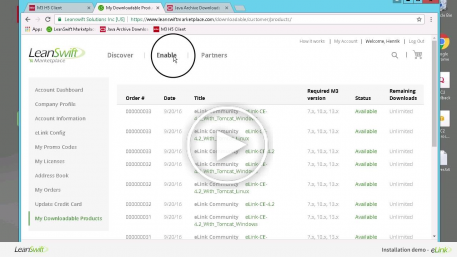
- Login to your Infor M3 Marketplace account
- Go to your My Account -> My Downloadable Products page
- Download your preferred eLink version/package, with or without Apache Tomcat
- Make sure Java Runtime is installed on your server, if not you can download Java from here. JRE installation instructions can be found here. eLink has been tested on JRE 7 and JRE 8
Downloaded file (without Apache Tomcat)
Downloaded file (without Apache Tomcat)
- Install Apache Tomcat. Instructions to install can be found here.
- Place the WAR file inside TOMCAT_HOME/webapps where TOMCAT_HOME is the Tomcat installation path on your server. eLink is tested with Apache Tomcat 7.x and 8.x
- Configure SSL/TLS support on Tomcat. Instructions to do so are available here.
- Start Tomcat (For How to Start, see below)
Downloaded file for Linux (with Apache Tomcat in TAR.GZ format)
Downloaded file for Linux (with Apache Tomcat in TAR.GZ format)
- Extract contents of the downloaded file in a desired installation path location on your server
- Go to extracted location "/eLink-CE-7.6.0_With_Tomcat/conf/server.xml" and set the attribute keystoreFile, to extracted path/eLink-CE-7.6.0_With_Tomcat/keystore
- Ex: If eLink is extracted to /opt, set the keystore attribute in server.xml as follows
- keystoreFile="/opt/eLink-CE-7.6.0_With_Tomcat/keystore"
- Start Tomcat (For How to Start, see below)
Downloaded file for Windows (with Apache Tomcat in ZIP format)
Downloaded file for Windows (with Apache Tomcat in ZIP format)
- Extract contents of the downloaded file in a desired installation path location on your server
- Go to extracted location "/eLink-CE-7.6.0_With_Tomcat/conf/server.xml" and set the attribute keystoreFile, to extracted path/eLink-CE-7.6.0_With_Tomcat/keystore
- Ex: if eLink is extracted to C:\Software, set the keystore attribute in server.xml as follows
- keystoreFile="C:\Software\eLink-CE-7.6.0_With_Tomcat\keystore"
- Install Tomcat as a service using the command below. More instructions on Installing the tomcat as a service here
- Ex:
- C:\> cd apache-tomcat-7.0.70\bin
- C:\apache-tomcat-7.0.70\bin> service.bat install
-
- C:\apache-tomcat-7.0.70\bin>service.bat install
- Installing the service 'Tomcat7' ... Using CATALINA_HOME: "C:\apache-tomcat-7.0.70"
- Using CATALINA_BASE: "C:\apache-tomcat-7.0.70"
- Using JAVA_HOME: "C:\Java\jdk1.8.0_05"
- Using JRE_HOME: "C:\Java\jdk1.8.0_05\jre"
- Using JVM: "C:\Java\jdk1.8.0_05\jre\bin\server\jvm.dll"
- The service 'Tomcat7' has been installed.
- (or)
- C:\> cd apache-tomcat-7.0.70\bin
- C:\apache-tomcat-7.0.70\bin> service.bat install << ServiceName >>, where ServiceName is any name that you provide. If not provided the default name will be used.
- Once the service is installed, you can open 'Services' window to find the service installed in the given name (default name - Apache Tomcat7.0 Tomcat7 or Apache Tomcat8.0 Tomcat8). Note that 'Services' is usually available in 'Administrative Tools' in the 'Control Panel'. Also accessible through the 'Services' panel in 'Task Manager'.
- Start Tomcat (For How to Start, see below)

Start Tomcat
Start Tomcat
Linux OS
- Start Tomcat using ./catalina.sh start file.
- Ex:
-
ubuntu@ip-10-0-0-110:/eLink-CE-7.6.0_With_Tomcat/bin$ ./catalina.sh start
Windows OS
- Tomcat can be started in either of two ways - standalone or as a service
- Standalone : Run the startup.bat or catalina.bat from inside the bin folder in the tomcat installation path.
-
Ex:
C:\apache-tomcat-8.0.9\bin>startup.bat (or)
C:\apache-tomcat-8.0.9\bin>catalina.bat
- Service: Open 'Services' window, find the Tomcat service installed with the given name (default name - Apache Tomcat7.0 Tomcat7 or Apache Tomcat8.0 Tomcat8) and right-click and start the service. Note that 'Services' is usually available in 'Administrative Tools' in the 'Control Panel'. Also accessible through the 'Services' panel in 'Task Manager'
Stop Tomcat
Stop Tomcat
Linux OS
- Stop Tomcat using ./catalina.sh file.
- Ex:
-
ubuntu@ip-10-0-0-110:/eLink-CE-7.6.0_With_Tomcat/bin$ ./catalina.sh stop -force
Windows OS
- Tomcat can be stopped in either of two ways - standalone or as a service
- Service: Open 'Services' window, find the Tomcat service installed with the given name (default name - Apache Tomcat7.0 Tomcat7 or Apache Tomcat8.0 Tomcat8) and right-click and stop the service. Note that 'Services' is usually available in 'Administrative Tools' in the 'Control Panel'. Also accessible through the 'Services' panel in 'Task Manager'
- Standalone: Force kill the tomcat process running in windows.

Access eLink
Access eLink
Please Note: All communication with eLink is secure using https and SSL encryption. Infor M3 Marketplace works only on eLink installed with HTTPS support. So configuring SSL support on Tomcat is mandatory.
- Your eLink will be available on the url https://yourserver:8443/(eLink version name)
"Yourserver" is the public host name (or public ip) of your server and 8443 is the default port on which Tomcat runs. Make sure this URL is available externally from outside your company network.You can configure Tomcat to start in any other open port on the server by modifying TOMCAT_HOME/conf/server.xml.
For example: https://yourserver:8443/eLink-CE-7.6.0/
Configure eLink
Configure eLink
- Go to your Infor M3 Marketplace account My Account -> eLink Config.
- In the field for eLink Host Name/IP enter the public DNS name or the server public IP (for example 52.26.237.171 or elink.leanswiftmarketplace.com).
- In the eLink Name dropdown select the version of eLink that you have installed (for example eLink-CE-7.6.0).
- In the Port field enter the port that you have configured your tomcat to run (for example 8443).
-
Press Submit. This will save the eLink connection information and attempt to connect to your eLink instance. Any error messages at this stage is likely connection issues because your eLink cannot be reached from Infor M3 Marketplace. The host and port configured must be publicly accessible.
-
Once access has been established enter configuration data corresponding to your M3 environment in the sections for M3 Database settings and M3 API settings. eLink will use these settings to connect to M3. Add details of your mail server (if applicable).
-
1) M3 Database Connection Pool Initial Size - 5 (recommended)
-
2) M3 Database Connection Pool Max Active Connections - 10 (recommended)
-
Press Submit. Your eLink installation will be updated with the configuration and is now ready for use.
-
In the "Environment" Field enter the environment you want to configure with this eLink (for example DEV).
-
Press Save. This will attempt to connect to your eLink instance. Any error messages at this stage is likely connection issues because your eLink cannot be reached from Infor M3 Marketplace. The host and port configured must be publicly accessible.
-
Once access has been established, press Retrieve Configuration. If connection is established to your eLink instance, Global Settings and Application Settings sections will appear. Enter configuration data corresponding to your M3 environment in Global settings section. eLink will use these settings to connect to M3. Configure values in Application settings, if applicable.
-
Please find below recommended values for some of the configurable settings.
-
1) M3 Database Connection Pool Initial Size - 5 (recommended)
-
2) M3 Database Connection Pool Max Active Connections - 20 (recommended)
-
Press Save. Your eLink installation will be updated with the configuration.
Versions < 6.0
For Versions < 6.0,
Versions < 6.0
For Versions >= 6.0,
Upgrade eLink
Upgrade eLink
When upgrading Leanswift eLink to a newer version there are a few important steps to go through. But before you begin:
- Your settings are stored in eLink and not in the marketplace cloud service. Because of this your current configuration may need to be redone. To facilitate this please make sure to note down your current configuration of the eLink.
- Login into Infor M3 Marketplace. My Account -> eLink Config.
- Make sure "eLink Name" is set to your existing eLink version.
- Click on Retrieve Configuration and get all the existing configuration values.
- Note the values.
Once that is done, to proceed with upgrading eLink to a new version follow the steps below:
- Take a backup of database file.
- Download and install/update the latest WAR in Tomcat.
- Update configuration through Marketplace.
- Activating Licenses.
Take a backup of database file
- Stop Apache Tomcat (For How to Stop, refer)
- Take backup of database file from file path
- default path for v7.6.0 or later "tomcat directory/eLinkDB/eLink-CE-7.6.0/eLink.db"
- default path for v4.2 or later "tomcat directory/tomcat-Folder-Nameh2databaseStoreFile.db.mv.db" .

Note: A backup is recommended to be taken, as this contains data for eLink to work with applications and Marketplace.
Download and update the latest war in tomcat
- Get latest version of eLink 'war' file from here. Pick your version (CE or EE) and add to cart and proceed with checkout.
- Once Checkout is successful. Go to My Account -> My Downloadable Products, there you can see all the available products for download. Click on the eLink that you want to download (look at the Date column and make sure you are selecting the latest version), the download starts automatically.
- Replace WAR file in Apache Tomcat where your current version of eLink is installed. Steps to keep in mind while replacing WAR are as follows.
- Windows
- Go to tomcat-directory\webapps folder and take a backup of eLink-CE-6.0.1 war file and folder to a location outside of the tomcat directory path.
- Delete both eLink-CE-version.war file and the extracted WAR file folder eLink-CE-version from the webapps folder, that is already present inside Tomcat
- Right Click and Click on 'Delete' option to delete these.
- Place the new upgraded eLink - eLink-CE-version.war inside Apache Tomcat's webapps folder (Example: tomcat-directory/webapps folder.).


- Unix/Linux
- Stop tomcat (For How to Stop, refer)
-
ubuntu@ip:dir/tomcat$./catalina.sh stop -force
- Navigate to webapps folder.
- Ex:
-
ubuntu@ip:~$ cd dir/tomcat/webapps/
- List the content of the folder
ubuntu@ip:dir/tomcat/webapps$ ls -lart
-rwxrwxrwx 1 tomcat tomcat 49625845 Aug 5 09:52 eLink-CE-4.4.3.war
drwxrwxrwx 4 tomcat tomcat 4096 Aug 5 09:52 eLink-CE-4.4.3
- Take backup of the eLink-CE-4.4.3.war and eLink-CE-4.4.3 folder using the below command.
-
ubuntu@ip-10-0-0-110:dir/tomcat/webapps$ cp -r dir/tomcat/webapps/eLink-CE-4.4.3/dir-to-backup
- Delete the war file and deployed folder of the war file using the below command. Example:
ubuntu@ip:dir/tomcat/webapps$rm -rf eLink-CE-4.4.3
ubuntu@ip:dir/tomcat/webapps$rm -rf eLink-CE-4.4.3.war
- Place new upgraded eLink - eLink-CE-version.war inside webapps folder (i.e- rootdir/tomcat/webapps).
- Transfer the new war file from local to unix/linux account.
- Then copy the war file to webapps folder.
- Ex:
-
cp eLink-CE-latest-version root-dir/tomcat/webapps

Updating the configurations through Marketplace
- Login into Infor M3 Marketplace. Go to your My Account -> eLink Config.
- Select "eLink Name" for the version you are upgrading to. Verify Hostname and port.
- For Versions < 6.0,
-
Click on Retrieve Configuration. Once default values are retrieved successfully, update settings for M3 database, M3 API & Mail and save configuration.
- For Versions >= 6.0,
-
Click Save .This will attempt to connect to your eLink instance.
-
Press Retrieve Configuration. Global Settings and Application Settings sections will appear. Update configuration data corresponding to your M3 environment in Global settings section.
- Restart Apache Tomcat.(To stop, refer and To start, refer)
Activating Licenses
- Go to your My Account -> My Licenses and click on "Activate Licenses in eLink" to reactivate all the active licenses in the upgraded eLink.
Common errors and instructions to troubleshoot
Common errors and instructions to troubleshoot
- Unable to start Tomcat with JAVA_HOME error
-
C:\eLink-CE-7.6.0_With_Tomcat\bin> startup.bat (or)
C:\eLink-CE-7.6.0_With_Tomcat\bin> catalina.bat
Neither the JAVA_HOME nor the JRE_HOME environment variable is defined.
Atleast one of those environment variable is needed to run this program.
- Solution:
- Connection refused error
- Solution:
- What if my tomcat is not restarting after upgradation without throwing any errors?
- After upgrading eLink, if there is some issue in starting Tomcat then clear your tomcat work directory and try starting Tomcat.
- How to clear the tomcat work directory.
- Stop the Apache Tomcat server. (For How to Stop, refer)
- Go to tomcat-directory\work\Catalina\localhost folder
- Important! Verify that you are in the tomcat-directory\work\Catalina\localhost folder and not the tomcat-directory\webapps folder.
- Delete eLink project folder.
- Restart the Apache Tomcat. (To stop, refer and To start, refer)
- What if the mobile app throws an error "Invalid Marketplace-ApiKey or Company Id"?
- There may be a problem in Active License Keys in eLink. Go to My Licenses and click Activate Licenses in eLink.
Setting up JAVA_HOME or JRE_HOME in the Windows environment variables should resolve the problem. Example can be found here. Remember to relaunch the command prompt after adding environment variables if you were using it to start the tomcat.
The Port could be incorrect. Please verify that startup port is configured correctly in TOMCAT_HOME/conf/server.xml. Another common problem is that the Windows Firewall is blocking ports, so please ensure both company network firewall and the Windows Firewall on the server itself are not blocking the port. A common issue is that the port is open in the company firewall, but the Windows firewall on the server itself is blocking it.

Please Note: LeanSwift does not store your eLink configuration. It is retrieved and updated securely through your Infor M3 Marketplace account, but never stored anywhere. The only thing stored in Marketplace is your eLink host and port.
If you have questions, please submit your query at Contact Us or email us at marketplace@leanswift.com